


30 November 2023
Prerequisites
For this tutorial, you will need:
- An Azure account with the rights to create a resource group and an App Service;
- Terraform installed;
- Azure CLI;
- A Google account and access to the Google API dashboard. This tutorial can also be adapted to the other identity providers supported by App Service: Azure Active Directory, Microsoft, Facebook, and Twitter.
The beginning: Terraform, a simple web application running on Azure App Service
An application to deploy on App Service
The first step before adding Google authentication to a web application is to deploy one on an Azure App Service with Terraform. In this tutorial, we will use a very simple web application echoing HTTP requests, as shown in the example below, but feel free to use your run your own Docker image on the App Service!

A Terraform code snippet to deploy the application
Because the deployment of a dockerized web application with Azure App Service is not the topic of this tutorial, here is a minimal Terraform code snippet to deploy an application:
## main.tf ##
# Terraform basic configuration
terraform {
  required_providers {
    azurerm = {
      source  = "hashicorp/azurerm"
      version = "=2.77.0"
    }
  }
}

provider "azurerm" {
  features {}
}

# Create a ressource group for the tutorial
resource "azurerm_resource_group" "tutorial-google-auth" {
  name     = "tutorial-google-auth"
  location = "France Central"
}

# Create a simple app service plan for the web app
resource "azurerm_app_service_plan" "tutorial-google-auth" {
  name                = "tutorial-google-auth-appserviceplan"
  location            = azurerm_resource_group.tutorial-google-auth.location
  resource_group_name = azurerm_resource_group.tutorial-google-auth.name
  kind                = "Linux"
  reserved            = true

  sku {
    tier = "Standard"
    size = "S1"
  }
}

# Deploy the web app with an app service
resource "azurerm_app_service" "tutorial-google-auth" {
  name                = "tutorial-google-auth-app-service"
  location            = azurerm_resource_group.tutorial-google-auth.location
  resource_group_name = azurerm_resource_group.tutorial-google-auth.name
  app_service_plan_id = azurerm_app_service_plan.tutorial-google-auth.id

  site_config {
    linux_fx_version = "DOCKER|mendhak/http-https-echo:19"
  }
}

output "webapp-url" {
  value = azurerm_app_service.tutorial-google-auth.default_site_hostname
}
Apply the Terraform code to deploy the application on App Service without authentication
Let’s transform the snippet of Terraform code into a web application!
- Create a file
main.tfand paste the code snippet above. Save the file and open a terminal in your working directory. - Login to Azure with Azure CLI to allow Terraform to manage Azure resources:
az login- This command redirects to the Microsoft login page. When the login succeeds, you can go back to your terminal.
- Init Terraform with the command:
terraform init- You can then apply the Terraform configuration with the command:
terraform apply- At the end of the apply, Terraform outputs the URL for the freshly deployed App Service running the web application.
## Output of the command terraform apply ##
Apply complete! Resources: 3 added, 0 changed, 0 destroyed.

Outputs:

webapp-url = "tutorial-google-auth-app-service.azurewebsites.net"- Try to access it. You should land on a page displaying as a JSON the HTTP request you just sent to the App Service. I know it’s not a very funny application, but it will be very useful to illustrate OAuth 2.0 protocol later.
The web application is now online but without authentication.
- If your application contains sensitive data that should be only accessible to your coworkers, you should probably not let it be publicly accessible.
- Maybe your application needs user accounts to work, and you don't want to risk creating a security breach if you implement authentication by yourself.
This is where OAuth 2.0 comes in handy! So, let's talk a bit about OAuth 2.0.
What is OAuth 2.0, and how can it help?
What is OAuth 2.0?
OAuth 2.0 is an authorization standard. It is designed to allow clients (i.e. websites such as the application deployed in this tutorial) to access the resource owner's (i.e. the user: you or me) data from a resource server (i.e. the server containing data about your profile, for instance, Google API in this tutorial).
We won't cover the details of the OAuth 2.0 protocol in this article, but here are the main steps of an OAuth 2.0 authorization:
- First step: The client (application) requests the resource owner (user) authorization to access the data. If the authorization is granted, the client receives an authorization grant.
- Second step: The client can now contact the authorization server with the authorization grant. If the authorization code is valid, the server delivers an access token to the client.
- Third step: With the access token, the client can contact the resource server's API to fetch user data.
OAuth 2.0 and Google
In this tutorial, our HTTP echo application is the client, the user is the resource owner, and Google provides both the authorization server and the resource server. Below is a quick recap of the situation:

The best thing is that we don't have to implement steps 1 and 2 in the web application because Azure App Service automatically manages steps 1 and 2 for us!
Register our application as an OAuth 2.0 client
Before configuring the App Service to log the user in with Google and fetch an access token, we must register the application as a Google OAuth 2.0 client. Here is the procedure:
- Go to the Google API console.
- First, we have to configure an OAuth consent screen. It is a screen displayed to the user on the first login to our application.
- If you haven't configured an OAuth consent screen yet, click on OAuth Consent Screen in the side menu. Choose the type of Google account allowed to access your App Service (your organization only or every Google account). Fill out the form with the information about your app.

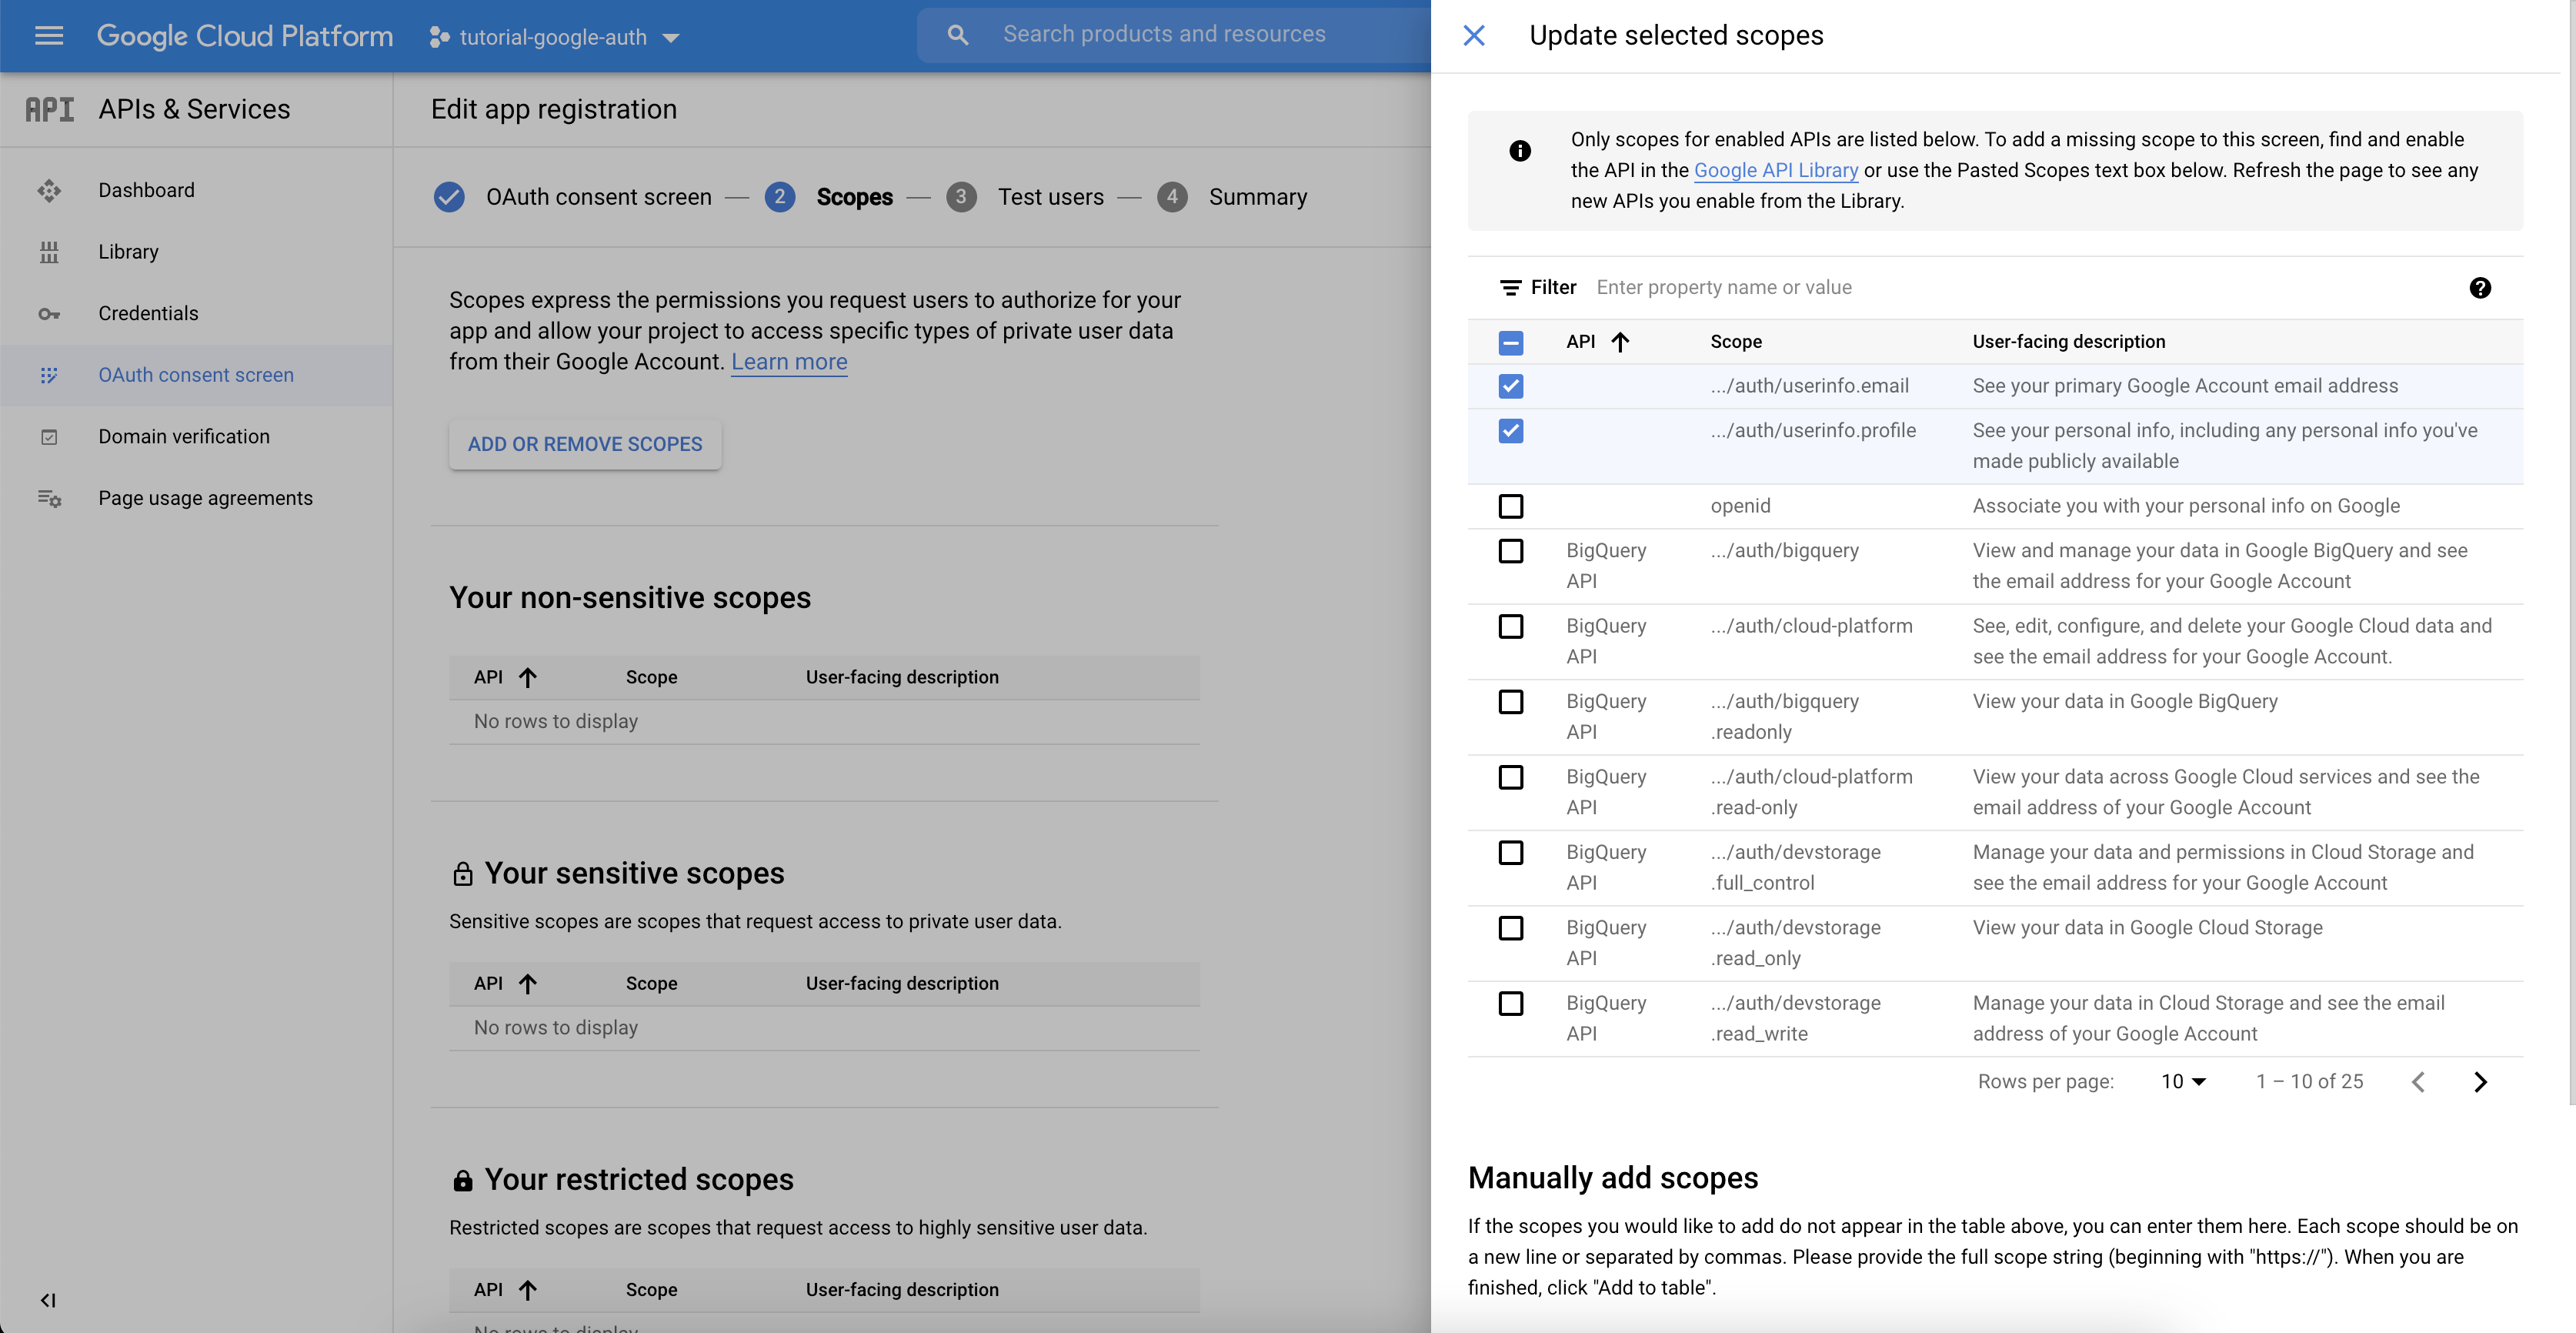
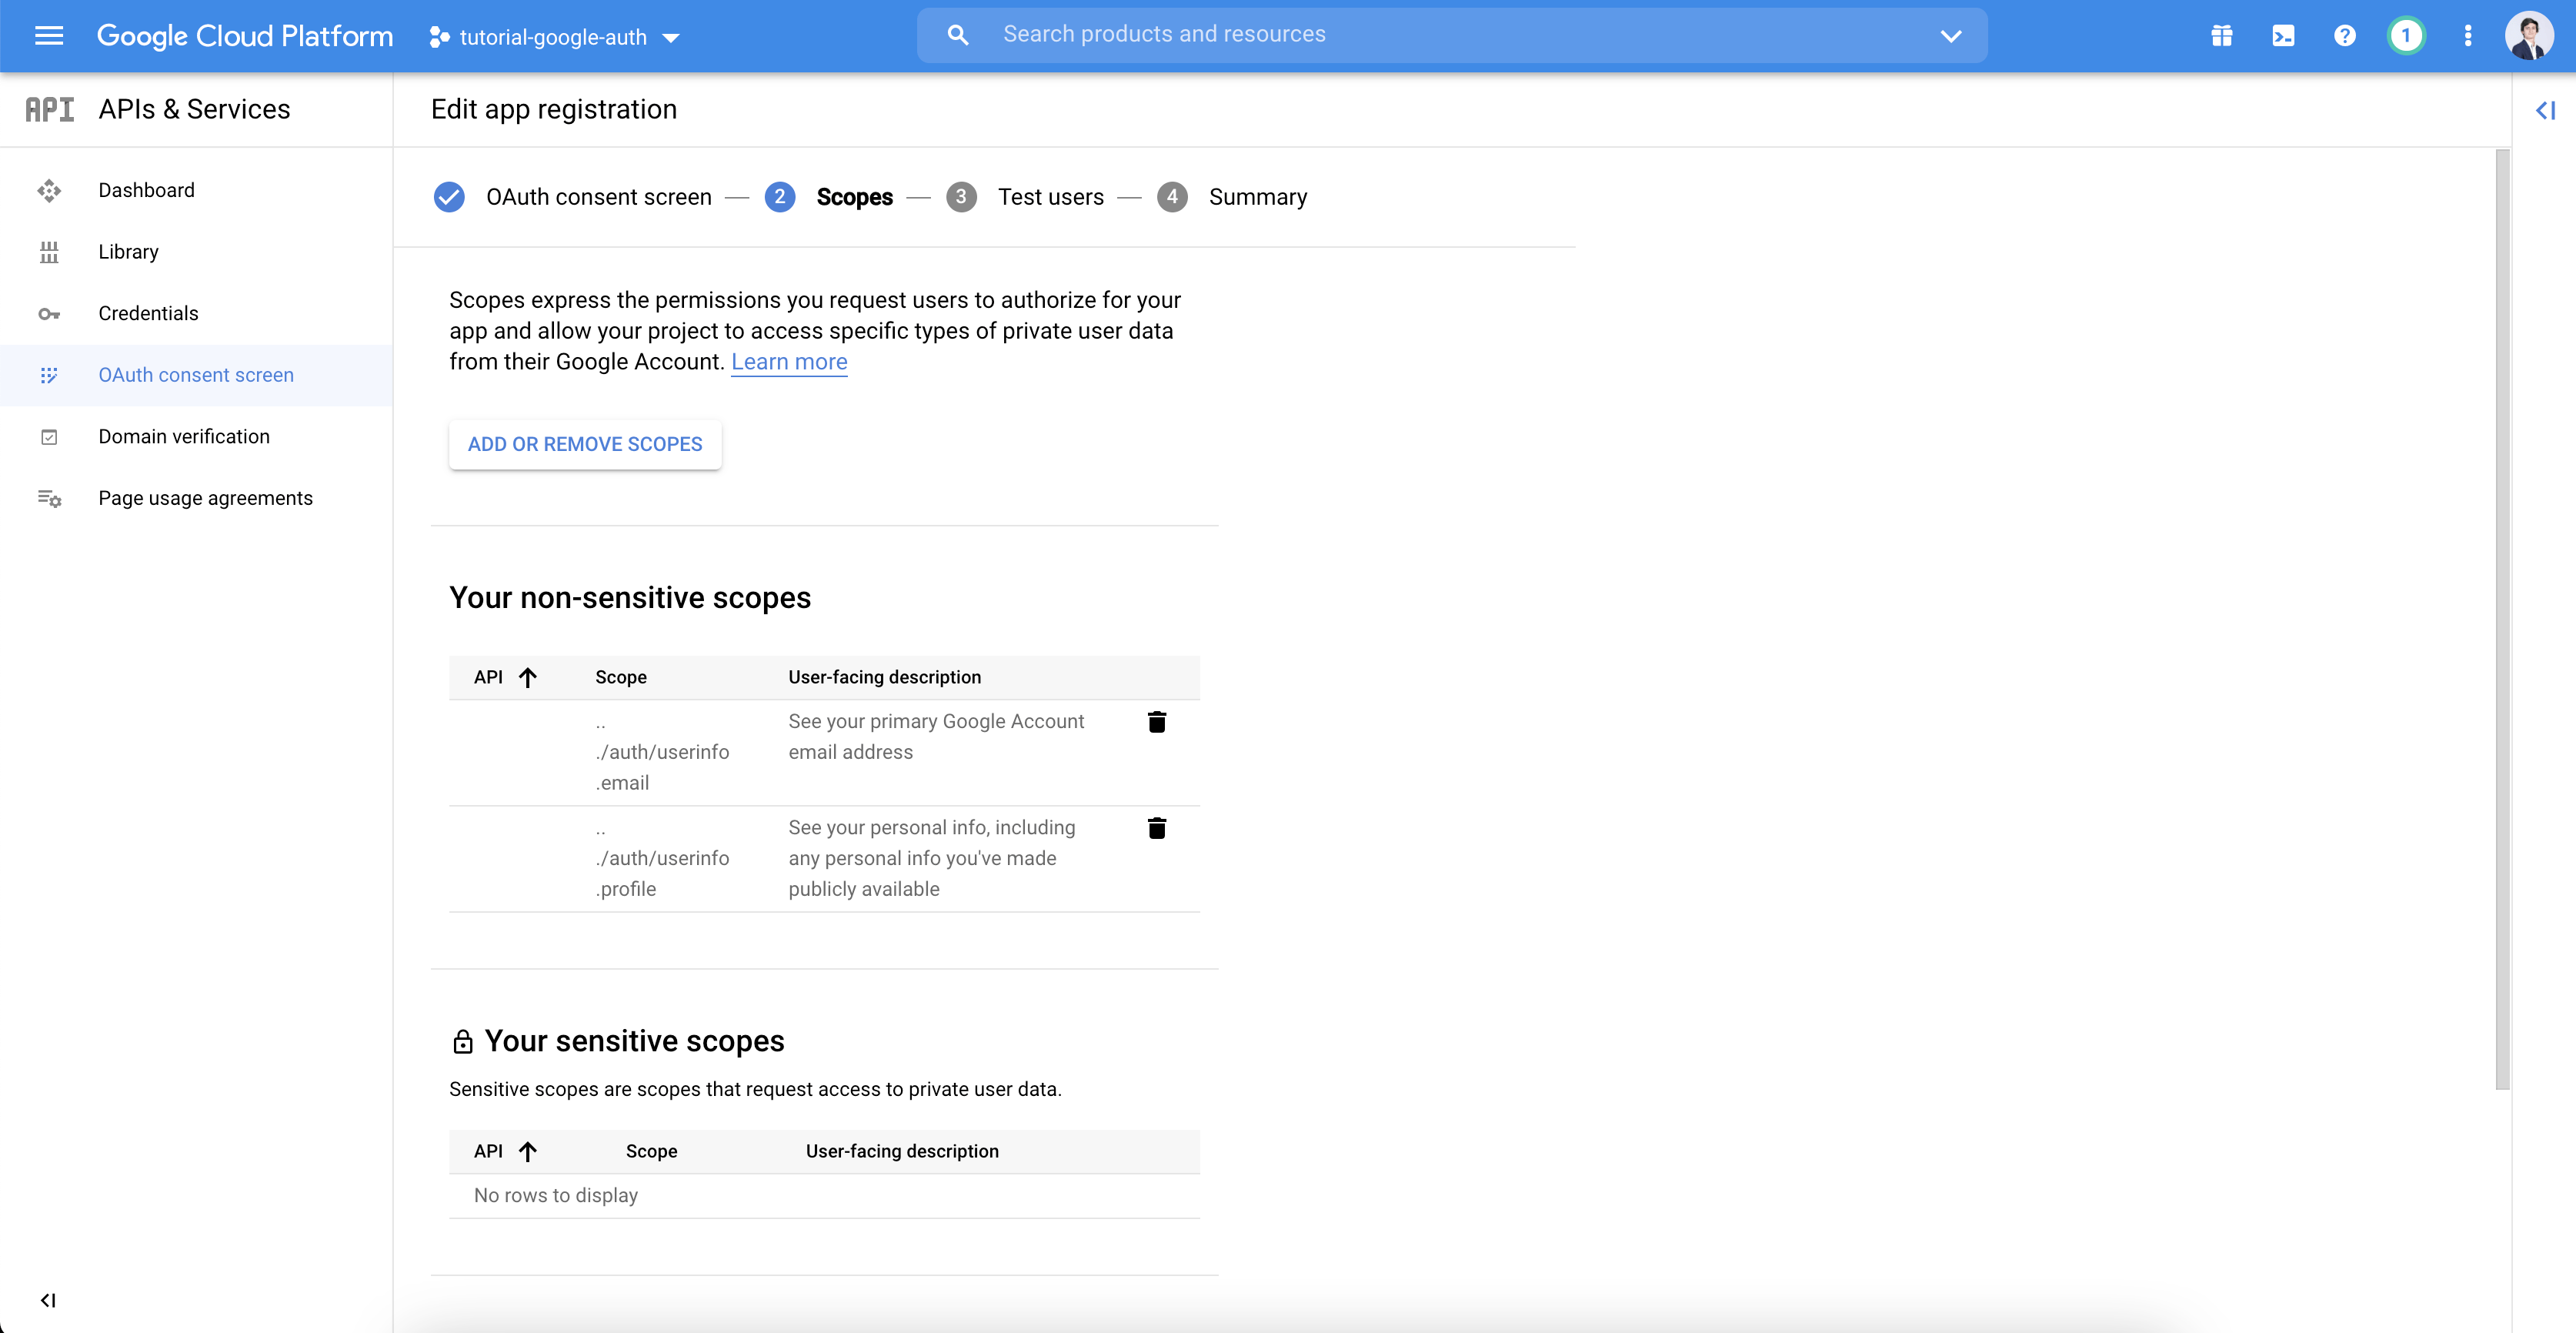
- Save and continue to the scopes section. A scope defines the data that can be accessed by your application. For this tutorial, we will only access basic user data corresponding to the scopes userinfo.email and userinfo.profile, but feel free to explore other scopes!
- Add the scopes userinfo.email and userinfo.profile and save and continue until the OAuth consent screen is created.
- Your OAuth client was created but is still in testing mode, i.e. only accessible to specified testing users. Click on Publish app to make your OAuth client publicly available.

- You can now create a pair of credentials for your app registration. In the Credentials menu, create an OAuth client ID. Select Web as Type. In Authorized JavaScript origins, add the URL of your App Service (https://<your-app-name>.azurewebsites.net). In Authorized Redirect URIs, add https://<your-app-name>.azurewebsites.net/.auth/login/google/callback.

- Save and take note of the 2 values displayed (client ID and client secret). We will use these values later.
We now have an active app registration. We did it manually to focus on the App Service configuration, but it is also possible to Terraform Google Identity Platform configuration if you want to go further. For the moment, let's configure the App Service!
Implement OAuth 2.0 on the App Service
OAuth 2.0 in the Terraform code
Adding OAuth 2.0 on an App Service resource in Terraform is quite straightforward. The only change required is the addition of a block auth_settings defined as below to the azurerm_app_service resource:
## part of main.tf ##
resource "azurerm_app_service" "tutorial-google-auth" {

	# ...

  auth_settings {
    default_provider              = "Google"
    enabled                       = true
    token_refresh_extension_hours = 72
    token_store_enabled           = true
    unauthenticated_client_action = "RedirectToLoginPage"

      google {
        // We will configure Google auth provider here
      }
  }

}
The code above enables authentication. The next step is therefore to configure the Google authentication provider with the client ID we created in the previous section.
 ## part of main.tf ##
	auth_settings {

	   # ...

      google {
        client_id     = "<client_id>"
        client_secret = "<client_secret>"
        oauth_scopes  = ["userinfo.email", "userinfo.profile"]
      }
  }
Note: This tutorial provides a minimal Terraform code. The client ID and client secrets should not be committed, it is therefore highly recommended to store your secrets in a vault and retrieve them in Terraform with a datasource instead of strings in this block.
In the end, the new version of the file [main.tf](<http://main.tf>) is as follows:
## main.tf ##
# Terraform basic configuration
terraform {
  required_providers {
    azurerm = {
      source  = "hashicorp/azurerm"
      version = "=2.77.0"
    }
  }
}

provider "azurerm" {
  features {}
}

# Create a ressource group for the tutorial
resource "azurerm_resource_group" "tutorial-google-auth" {
  name     = "tutorial-google-auth"
  location = "France Central"
}

# Create a simple app service plan for the web app
resource "azurerm_app_service_plan" "tutorial-google-auth" {
  name                = "tutorial-google-auth-appserviceplan"
  location            = azurerm_resource_group.tutorial-google-auth.location
  resource_group_name = azurerm_resource_group.tutorial-google-auth.name
  kind                = "Linux"
  reserved            = true

  sku {
    tier = "Standard"
    size = "S1"
  }
}

# Deploy the web app with an app service
resource "azurerm_app_service" "tutorial-google-auth" {
  name                = "tutorial-google-auth-app-service"
  location            = azurerm_resource_group.tutorial-google-auth.location
  resource_group_name = azurerm_resource_group.tutorial-google-auth.name
  app_service_plan_id = azurerm_app_service_plan.tutorial-google-auth.id

  site_config {
    linux_fx_version = "DOCKER|mendhak/http-https-echo:19"
  }

  auth_settings {
    default_provider              = "Google"
    enabled                       = true
    token_refresh_extension_hours = 72
    token_store_enabled           = true
    unauthenticated_client_action = "RedirectToLoginPage"

      google {
        client_id     = "<client_id>"
        client_secret = "<client_secret>"
        oauth_scopes  = ["userinfo.email", "userinfo.profile"]
      }
  }

}

output "webapp-url" {
  value = azurerm_app_service.tutorial-google-auth.default_site_hostname
}
Apply the Terraform code to deploy OAuth 2.0 on the App Service
The Terraform code to deploy our web app has been edited to implement Google authentication. Let's deploy and see the results!
- Run the command to apply the changes.
terraform apply- Approve the operation and wait for Terraform to end the apply.
- To test the authentication, open the URL in incognito mode. The App Service should redirect you to a Google login page.

- Log in with your Google account, and here is the application! We successfully added OAuth 2.0 authentication to an Azure App Service. That was very easy, wasn't it?
The Azure App Service is now secured with OAuth 2.0! Are we done?
We managed to add OAuth 2.0 on an Azure App Service with very few changes in the Terraform code. The web application is now only accessible after login with a Google account. But what if you want to give admin rights to Jane Doe and only read-only rights to John Doe? You will need access to a basic user profile such as email or name in your application. That's where the magic of OAuth 2.0 strikes. And again, it is quite straightforward.
How do you retrieve a user profile?
In fact, Azure App Service manages almost everything for us: it fetches an access token at login and passes it to the web application as a header. All we have to do is query Google servers for the data with the access token in the headers. That's the reason why I chose an HTTP echo app for this tutorial.
- If you look closely, you will see in the headers a line starting with
x-ms-token-google-access-tokencontaining the access token.
"x-ms-token-google-access-token": "<a long token here>",- Let's query Google API to fetch user data:
curl -X GET "<https://openidconnect.googleapis.com/v1/userinfo>" -H "Authorization: Bearer <the access token here>"- Google API will send you back what we wanted
{
  "name": "John Doe",
  "given_name": "John",
  "family_name": "Doe",
  "picture": "<a link to the user's profile picture>",
  "email": "john.doe@gmail.com",
  "email_verified": true,
  "locale": "fr"
}
Thanks to the access token, the application deployed on the Azure App Service can query Google servers to fetch basic information about the user whenever it is needed. We can do even better! Google provides a lot of APIs and OAuth scope. It is, therefore, easy to enhance your application to grant access to some resources only to a group of users in your organization to interact with the users' files stored in Google Drive, Gmail, or Google Agenda. The possibilities are endless!
In this tutorial, we learned how to deploy an Azure App Service secured with Google authentication with Terraform in a snap. We also discovered the basis of OAuth 2.0 protocol at the heart of Google auth. Eventually, OAuth 2.0 allowed us to fetch information about the user logged in.
We used Azure App Service in this tutorial, but it's not the only service capable of managing a login with OAuth 2.0. If you're deploying your application on Kubernetes, you might want to have a look at Kong API Gateway and its OAuth 2.0 plugin.
I hope this tutorial helped you understand OAuth 2.0 and how helpful it is to protect and enhance your application. Now, you have no excuse not to protect your sensitive App Service!