

Posted on 22 January 2020, updated on 6 August 2021.
Prerequisites
First, you’ll need :
- A working
docker-compose.ymlfile with a Spring Boot application - IntelliJ installed
Then you need to install in IntelliJ the following plugins :
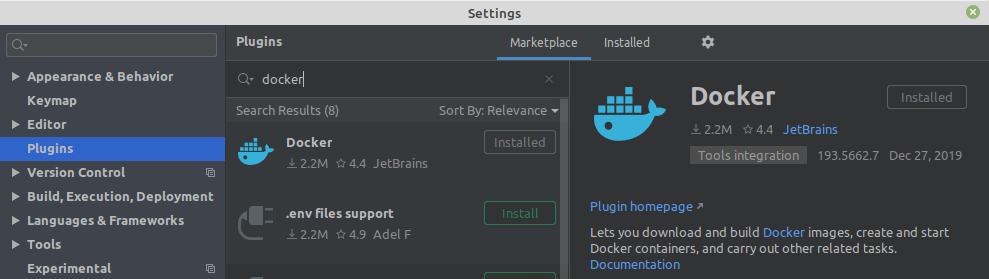
- Install Docker plugin (Ctrl + Alt + S)
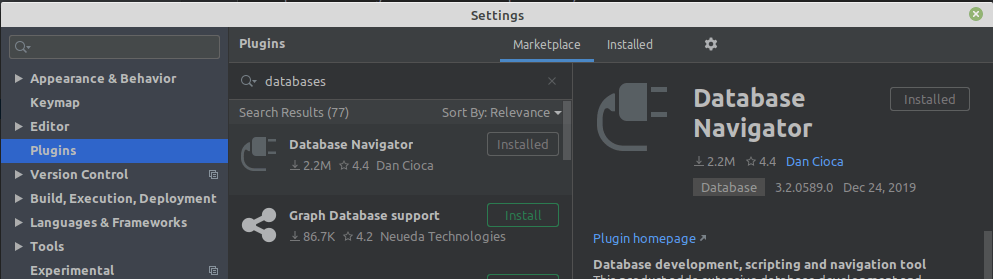
- (Optional) Install Database Viewer (Ctrl + Alt + S)
Run your Spring Boot application using Docker-Compose
- Open your
docker-compose.ymlfile. - Click on the icon right before the "services:". It will deploy your Spring Boot service alongside the rest of your services. You'll be able to see them in the Services Viewer section on the bottom.
![viewer-button]()
![icon-right-services]()
- Inspect your containers by clicking them:
![Inspect-containers]()

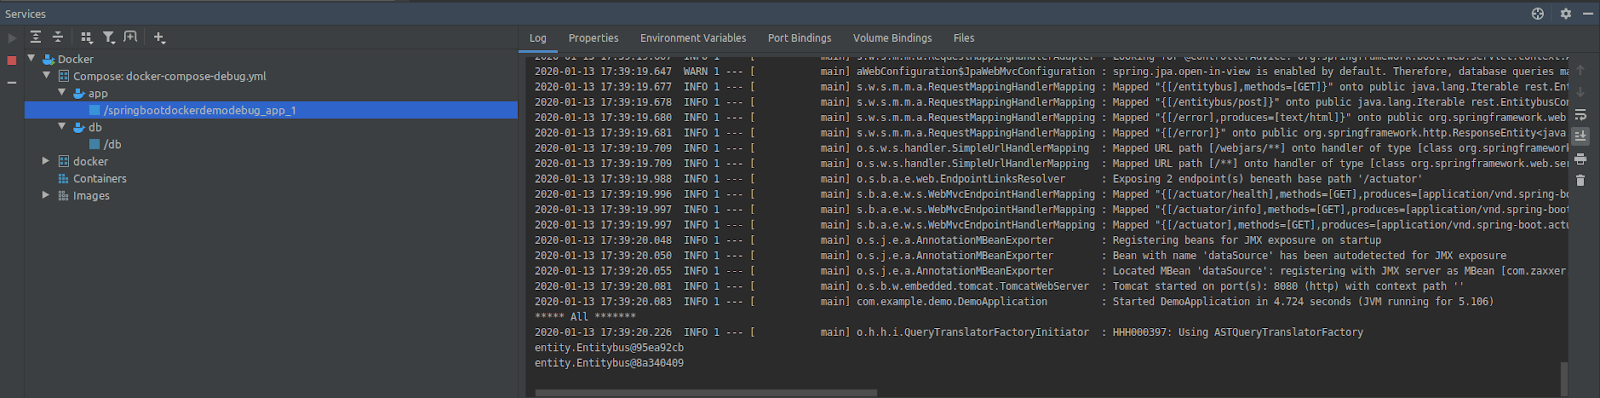
You'll see different View interfaces linked to your Spring Boot container such as:
- Log: Contains the logs of your container.
- Properties: Contains Image ID, Container ID and Container names value.
- Environment Variables: Contains the different environment variables inside the container.
- Port Bindings: Contains the different port bindings of the Docker bridge network.
- Volume Bindings: Contains the list of the different volume bound to this container.
- Files: Contains the list of Files inside the container.
Also, by clicking on your container in the View interfaces, you can select “Exec” option which allows you to run a command inside the container. For example, you can directly:
Exec -> `bash`: Which runs ssh terminal inside your container

;4. (Optional) Connecting to your database is also made easy thanks to the Database tool window:
- In View → Tool Windows → Db browser
Debug your Spring Boot application
Configuration
To debug your Spring Boot application pass through a remote debug, there are two ways to proceed:
1. Directly debug a command line in your docker-compose.yml file
- Delete your running container(s), and then click on the debug icon next to your command line (in the example, the icon right after number line 29)

It will create again your container and stop to your breakpoint and debug your application:

2. Create your remote debug configuration manually
- Open your
docker-compose.ymlfile in IntellIJ - Click on the debug icon
- Select the module in the Use module classpath list
- Double-click the Docker-Compose run configuration in the Before launch list. If it is not in the list, click the Add button and select Launch Docker before debug. (See screenshot below)
- Select the Docker-Compose run configuration to launch before starting remote debug and make sure that it is configured to connect to the app service (your java app)
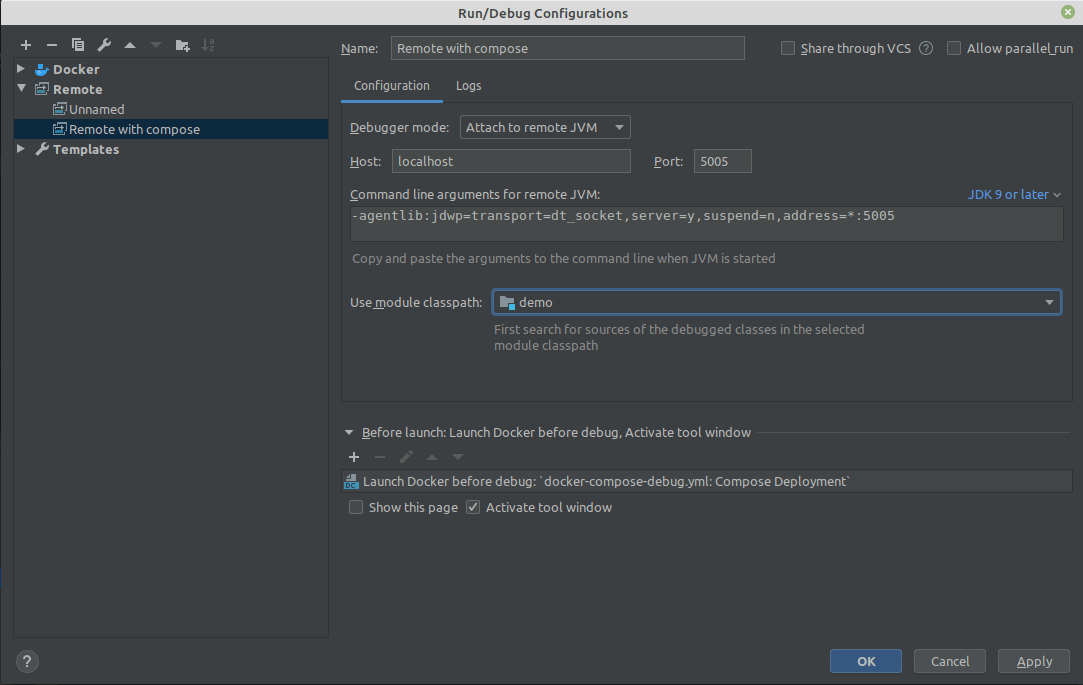
If the application is already running, do not run the debug configuration. Apply the settings and click Cancel.
You should now see your new remote debug configuration in the list on your top of intelliJ:

The Docker plugin provides a better understanding of the Docker system under your docker-compose.yml. Deploying Spring Boot Java applications will be easier now that you know how to run and debug them.