
Posted on 12 October 2021.
What is App Runner?
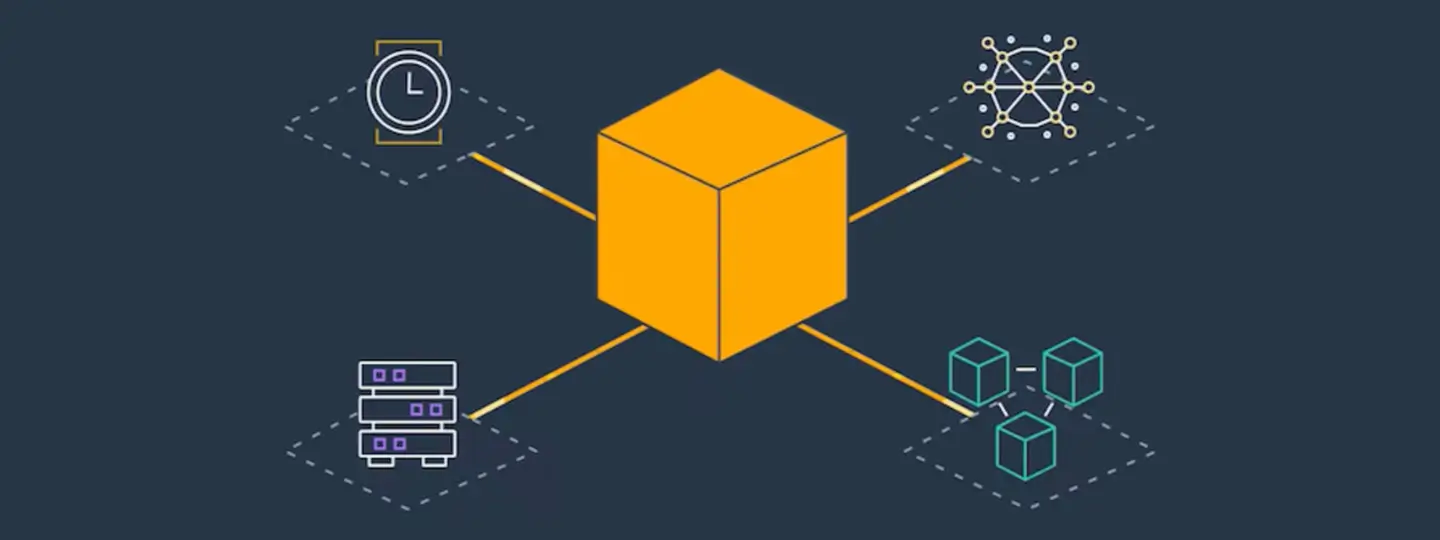
App Runner is an AWS service released on the 18th of May 2021 that allows you to directly run your code or containerized applications. It automatically builds, deploys applications, and distributes traffic with encryption.
App Runner can scale up or down automatically to meet your traffic needs.
Thanks to this new service, we can focus on code only without worrying about scaling or infrastructure.
For what?
Its principal use cases are web applications and APIs. App Runner is like Heroku, Digital Ocean app platform, or Google Cloud Run.
How does it work?
Pre-requisites
To be able to deploy an App Runner instance, we need:
- AWS console access
- AWS CLI installed
- AWS copilot (AWS official tool for managing containers)
Two deployment modes
Build mode
As the name implies, AWS pulls code from GitHub and builds the application on every change in this mode.
Triggers:
- Automatic: Every push to a specific branch deploys a new version of your service.
- Manual: Start each deployment yourself using the App Runner console or AWS CLI.
⚠ Only Python and Node.js are supported in build mode!️
Container mode
This mode consists of deploying docker images from private or public AWS ECR registries (only!).
Triggers:
- Automatic: App Runner monitors your registry and deploys a new version of your service for each image push.
- Manual: Start each deployment yourself using the App Runner console or AWS CLI.
Deploy a "Hello World" app 🚀
Create our application's content
We'll create a simple hello world python application using Flask.
First, let's create a hello.py file:
from logging import debug
from flask import Flask

app = Flask(__name__)

@app.route("/")
def hello():
    return "<Hello World!>"
Then, creates a requirements.txt file:
flask==2.0.1Finally, creates the Dockerfile file:
FROM python:3.9-alpine

WORKDIR /app

COPY . .

RUN pip install -r requirements.txt

ENV FLASK_APP=hello
ENV FLASK_RUN_HOST=0.0.0.0
ENV FLASK_RUN_PORT=8080

EXPOSE 8080

ENTRYPOINT [ "flask", "run" ]
I also got used to creating a .dockerignore file containing at least:
Dockerfile
copilot/
In this way, on build, the Dockerfile file and the future copilot directory will not be uploaded to the docker image.
Ok, we're now ready to run something unique 🚀
Run our application
It's time to run our fantastic HelloWorld application! 🤩
Since AWS Console is user-friendly enough, we'll cover the copilot CLI method.
Copilot uses CloudFormation to provision and manage AWS resources as its backend.
Pre-requisites for container mode
An ECR, or Elastic Container Registry, is an AWS-managed container image registry service. An ECR is a place in which we will store our Docker images.
If you plan to use container mode, you'll need to create an ECR and push your docker image into it.
To create an ECR using the CLI, log in to AWS:
aws ecr get-login-password --region <region> | docker login --username AWS --password-stdin <account_id>.dkr.ecr.<region>.amazonaws.comThen, create the repository:
aws ecr create-repository \
    --repository-name hello/web \
    --image-scanning-configuration scanOnPush=true \
    --region <region>
Where:
- hello will be our application's name
- web will be our service name
Now, you need to build your application. From your application's directory:
docker build -t hello-python .Finally, tag and push your image to your ECR:
docker tag hello-python <account_id>.dkr.ecr.<region>.amazonaws.com/hello:latestdocker push <account_id>.dkr.ecr.<region>.amazonaws.com/hello:latestAfter this, you can continue by reading the Build mode section 😉
Build mode
The first thing to do is to create the application and its service endpoint:
copilot init \
    --type "Request-Driven Web Service" \
    --app hello \
    --name web \
    --port 8080 \
--dockerfile Dockerfile--typeis the architecture of the service that we want to run. In this example, we want to run a Request-Driven Web Service, an internet-facing service deployed on AWS App Runner.--appis the application's name--nameis the service's name--portis the port exposed in our Dockerfile--dockerfileis the place where is our application's Dockerfile
For container mode, use --image "<account_id>.dkr.ecr..amazonaws.com/hello/web:latest" instead of --dockerfile Dockerfile
The init step will:
- Create an ECR for our hello app's web service (build mode only)
- Create the infrastructure to manage services and jobs under application hello
- Create the copilot directory (in the current directory) and write the manifest for service web at
copilot/web/manifest.yml
In the end, copilot should ask you to create a "test" environment. You can skip this step for now.
Now, we need to create a "production" environment. To do so:
copilot env init --profile default --name production --default-config --app hello --prod--profileis your credential's profile to use for deploying the application (~/.aws/credentials)--nameis the environment's name--default-configskip prompting and use default environment configuration--appis the application's name--prodindicate that the environment contains production services
This environment creation step will:
- Create all infrastructure and network resources such as:
- VPC
- Public subnets
- Private subnets
- Security groups
- ECS cluster
- Internet Gateway
- IAM roles
If everything goes well, you should see something like this:

We can now deploy our application with this last step
copilot svc deploy --app hello --env production --name webHere we are! 🚀

Finally, try accessing your application by accessing the URL provided by copilot:

Automatic deployment
Our application is now running, it's lovely! But how can we automate its deployment on code updates?
Well, there is some approach to do this, among them:
- Create an AWS CodePipeline with copilot (only Github is supported)
- Integrate all steps we did previously into Github Action or Gitlab CI/CD
Alright, let's use copilot and AWS CodePipeline!
Generate the pipeline's configuration files:
ccopilot pipeline init \
    --url https://github.com/<username>/<repository>.git \
    --environments "production"
The previous command will generate the following configuration files in your copilot directory:
buildspec.ymlpipeline.yml
Now, create the pipeline in CodePipeline in your AWS account:
copilot pipeline updateCopilot should ask you to do some manual actions:
✔ Successfully added pipeline resources to your application: hello
⠋ Creating a new pipeline: pipeline-hello-apprunner-python-exemple
ACTION REQUIRED! Go to https://console.aws.amazon.com/codesuite/settings/connections to update the status of connection copilot-Julie-apprunner-python-e from PENDING to AVAILABLE.
From the AWS Console, open the CodeSuite connections and click on the freshly created connection.
Then, click on Update pending connection. It will pop out a window asking you to authorize AWS connector to access your Github account:

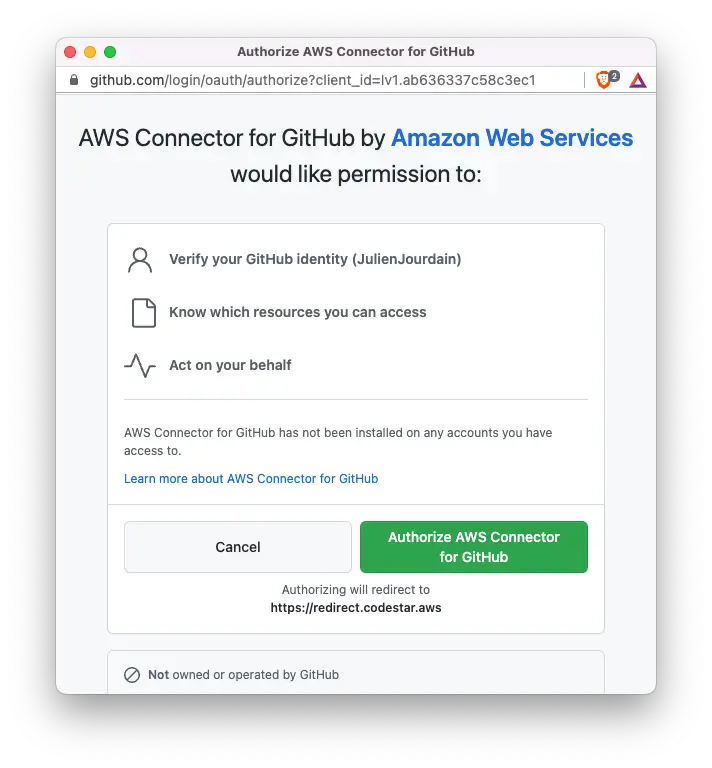
Click on Install a new app and then select your account and repository. Finally, click Install.

Now, AWS should let you connect:

Get back to your terminal; the pipeline update process must be done:

Let's test!
Try adding a file to your repository, or edit an existing one:
~$ echo "# Hello World" > README.md
~$ git add .
~$ git commit -m "feat(README.md): add readme file"
~$ git push -u origin main
From the CodePipeline section of the AWS Console, you can see the whole process running:


By default, CodePipeline will ask for your approval to go live. Just click on Review and then Approve. You're done, congrats! 🚀
My opinion on App Runner
App Runner is a pretty cool product, but I think it is currently not mature enough to be production-ready. The fact that an App Runner instance cannot connect with resources from inside a VPC (RDS, for example) or that we cannot use AWS Secret Manager is quite limiting IMO.
It is not shocking that App Runner is not production-ready since it was released four months before writing this article.
I listed below some good and "bad" points.
Pros
- Not locked with AWS
- No request time limits
- Simpler than AWS ECS and Fargate
- Custom domain name
- Can be fully private (VPC endpoint and VPC PrivateLink)
Drawbacks
- Cannot pull image outside ECR
- Cannot use Secret Manager
- Only Python and Node.js supported in build mode
- No scale to 0 → Have to pay for at least one instance at any time
- Less fine-grained configuration options than AWS ECS and Fargate (which could be a good point actually)
- Not possible to use resources from inside a VPC (e.g. App Runner using a private RDS DB)
- Only GitHub can be used as a source code repository
- No volume persistence
In any case, I think App Runner is nonetheless an excellent companion for carrying out PoCs.
Useful links
I want to share with you a few links which are helpful to follow: